A Comprehensive Guide on How to Zero In a Red Dot Sight
Red dot sights are popular aiming devices used by shooters to enhance accuracy and target acquisition. They utilize an illuminated reticle, typically in the form of a red dot, to help you align your firearm with your target. Unlike traditional iron sights, red dot sights are parallax-free, meaning that the point of aim remains on the target, regardless of eye position, making them ideal for quick, precise shots.
Importance of Zeroing in a Red Dot Sight
Zeroing, also known as sight adjustment, is the process of aligning the point of aim with the point of impact on the target. Properly zeroing your red dot sight is crucial because it ensures that your shots are on target and that you can trust your equipment when it matters most. Without a correctly zeroed red dot sight, you risk missing your target, especially at different distances.
Overview of What the Blog Post Will Cover
In this comprehensive guide, we will walk you through the process of zeroing in your red dot sight. We’ll cover everything from understanding red dot sights to the practical steps to achieve an accurate zero. By the end of this article, you’ll have the knowledge and skills to confidently zero your red dot sight, improving your shooting accuracy and performance.
Now, let’s dive into the world of red dot sights and learn how to zero them for pinpoint accuracy.
How to Zero In a Red Dot Sight: Understanding Red Dot Sights
Types of Red Dot Sights
Red dot sights come in several different configurations, each with its own unique advantages. Understanding these types will help you choose the one that best suits your needs:
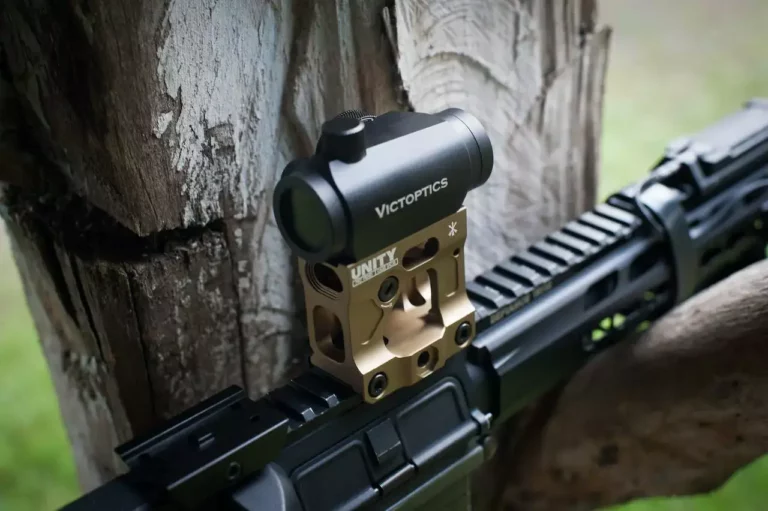
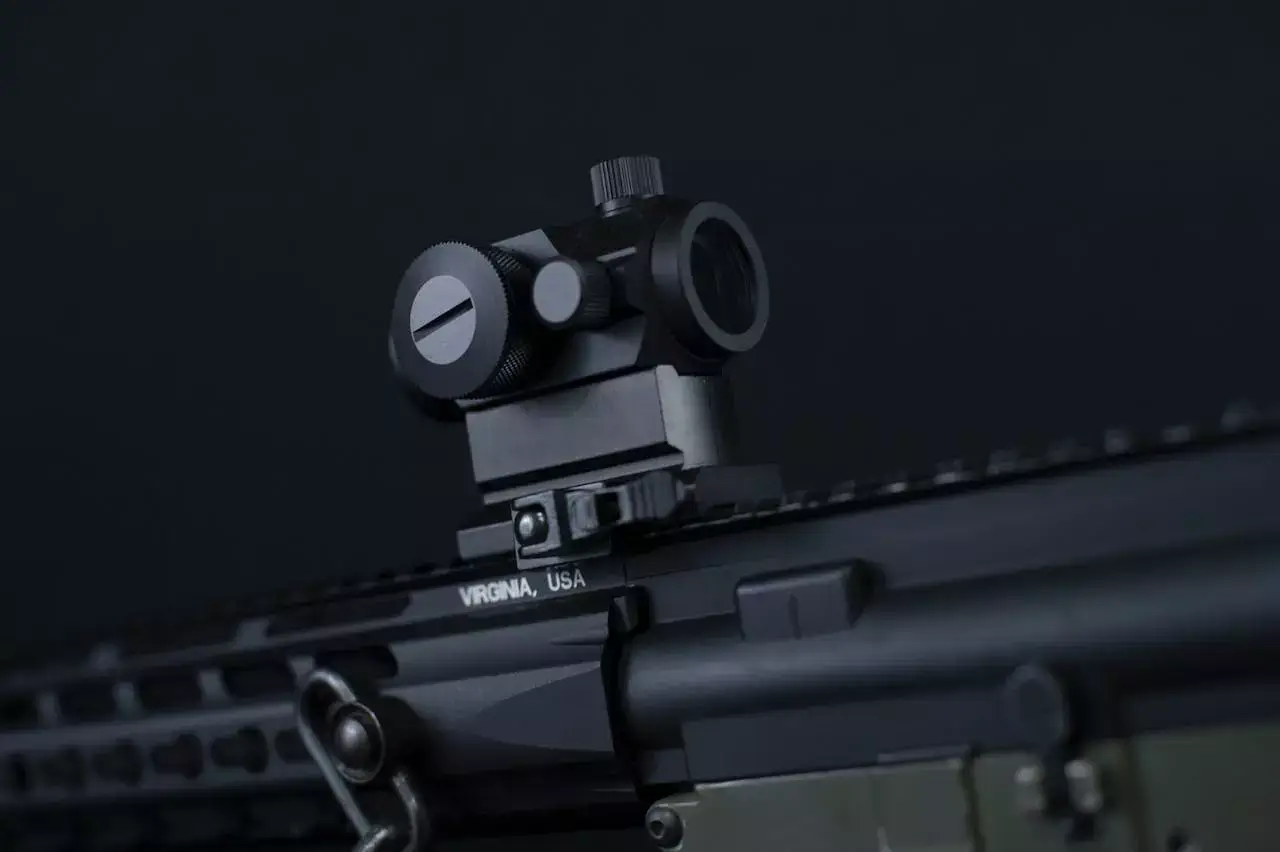
- Tube-Style Red Dot Sights: These are the most common type of red dot sights. They feature a cylindrical tube design and a single reticle dot in the center. Tube-style red dot sights are durable and reliable, making them suitable for a wide range of firearms and shooting scenarios.
- Reflex Red Dot Sights: Reflex sights have an open design, meaning there’s no tube surrounding the lens. They use a partially reflecting lens to project the reticle onto the lens, creating a “reflection.” Reflex sights are lightweight and offer a wide field of view, making them great for quick target acquisition.
- Holographic Red Dot Sights: Holographic sights use laser technology to project a holographic reticle onto the lens. They are known for their unlimited eye relief, which means you can maintain proper sight picture regardless of eye position. Holographic sights are popular for fast, close-quarters shooting.
How Red Dot Sights Work
Red dot sights function on a simple principle: they use a light-emitting diode (LED) to project a red dot reticle onto the lens. This reticle, often in the shape of a dot, appears as if it’s on the same focal plane as the target. Here’s how it works:
- LED Illumination: The LED emits a red light that reflects off a specially coated lens.
- Parallax-Free Design: Red dot sights are parallax-free, meaning that the reticle remains on the target, regardless of your eye position. This eliminates the need for perfect eye alignment with the sight, allowing for rapid target acquisition.
- Adjustable Brightness: Most red dot sights have adjustable brightness settings to suit different lighting conditions. You can make the dot brighter or dimmer to match the environment.
Benefits of Using a Red Dot Sight
There are several advantages to using a red dot sight, making them a popular choice among shooters:
- Rapid Target Acquisition: Red dot sights allow for quick and intuitive target acquisition, reducing the time it takes to align your sights with the target.
- Increased Accuracy: Red dot sights improve accuracy, especially in fast-paced shooting scenarios. The single red dot makes it easy to maintain focus on the target while aligning your shot.
- Both-Eye-Open Shooting: With both eyes open, you can maintain situational awareness, which is crucial in tactical or defensive situations.
- Parallax-Free Design: The parallax-free design ensures that the point of aim remains on the target, regardless of your eye position. This greatly enhances accuracy.
- Versatility: Red dot sights can be used on various firearms, from handguns to rifles and shotguns, making them versatile tools for shooters of all disciplines.
By understanding the different types of red dot sights, how they work, and their benefits, you’ll have a solid foundation to appreciate the role of zeroing in these sights for maximum accuracy and effectiveness in your shooting activities.
Tools and Equipment
List of Necessary Tools and Equipment
To successfully zero in your red dot sight, you’ll need the following tools and equipment:
- Red Dot Sight: Ensure your red dot sight is securely mounted on your firearm.
- Firearm: Use the firearm you intend to use with the red dot sight.
- Ammunition: High-quality ammunition is essential for accuracy. Choose the same type and brand of ammunition you plan to use regularly.
- Stable Shooting Rest: A stable shooting platform, such as a shooting rest or sandbags, is crucial for consistent shots. It minimizes human error and helps ensure accurate results.
- Bore Sighter: A bore sighter is a valuable tool for getting your initial point of impact close to the target before fine-tuning.
- Screwdriver or Allen Wrench: You may need these tools to make adjustments to your red dot sight.
- Targets: Opt for targets specifically designed for sighting-in. They often feature grids and easy-to-read measurements for precise adjustments.
- Notebook and Pen: Keeping a record of your adjustments is vital for future reference and improvements.
- Eye and Ear Protection: Always prioritize safety by wearing appropriate eye and ear protection.
- Cleaning Kit: A clean and well-maintained firearm is essential for accurate shooting. Have a cleaning kit on hand.
Importance of Quality Ammunition and a Stable Shooting Platform
- Quality Ammunition: Using high-quality, consistent ammunition is paramount when zeroing your red dot sight. Inaccurate or inconsistent ammunition can lead to frustration and confusion during the zeroing process. Ensure your ammunition is from a reputable manufacturer and is the same type and brand you intend to use regularly. This consistency is crucial for achieving and maintaining your zero.
- Stable Shooting Platform: A stable shooting platform is equally important. Whether you’re using a benchrest, sandbags, or a shooting sled, a stable platform minimizes human error and external factors that can affect your shots. It’s challenging to achieve precise zeroing if you’re shooting from an unstable position or without support. A stable platform ensures that your shots are consistent and that you can confidently make adjustments based on your results.
By having the right tools and equipment, as well as prioritizing quality ammunition and a stable shooting platform, you set yourself up for success in the zeroing process. These foundational elements are essential for achieving pinpoint accuracy with your red dot sight, which we’ll explore further in the upcoming sections of this guide.
Read Also: How to Level a Scope on a Rifle? (Step-by-Step)
Pre-Shooting Preparations
Before you embark on the journey of zeroing in your red dot sight, it’s essential to make a series of crucial preparations. These preliminary steps ensure a smooth and effective zeroing process, leading to greater shooting accuracy.
Mounting the Red Dot Sight
Mounting your red dot sight correctly is the first step toward achieving an accurate zero. Here’s how to do it:
- Choose the Right Mount: Ensure you have a mount that is compatible with your firearm. There are various mounts available, so pick one that fits securely and aligns the sight properly.
- Tighten Securely: When attaching the red dot sight to the mount, use the appropriate torque settings for the screws. Over-tightening can damage the sight, while under-tightening can cause it to become loose over time.
- Check for Level: Use a bubble level to ensure the red dot sight is mounted level on your firearm. This will help prevent elevation and windage errors during zeroing.
- Proper Position: Mount the sight at the appropriate position on your firearm’s rail or slide. This position should provide adequate eye relief and a comfortable cheek weld.
Proper Eye Relief and Cheek Weld
To achieve consistent and accurate shots, you need to establish the right eye relief and cheek weld:
- Eye Relief: Adjust your red dot sight so that it provides the correct eye relief. This is the distance between your eye and the sight where you can see the reticle clearly. The optimal eye relief varies depending on the sight and your firearm, so consult your sight’s manual for guidance.
- Cheek Weld: Maintain a proper cheek weld by positioning your cheek against the stock or riser of your firearm. This ensures a consistent sight picture and reduces the likelihood of parallax errors.
Bore Sighting the Firearm
Bore sighting is a technique used to align the firearm’s bore with the red dot sight. While it won’t provide a precise zero, it gets you close to the target before you start fine-tuning:
- Remove the Bolt or Slide: For safety, remove the bolt or slide from your firearm to prevent any accidental discharges.
- Center the Red Dot: Adjust the red dot sight’s windage and elevation settings to center the reticle on the bore’s center.
- Look Down the Bore: Without disturbing the firearm, look down the bore and adjust your aim until the bore is aligned with the target.
- Match the Red Dot: Now, look through the red dot sight, and adjust it until the reticle is also on the same target. This gets you very close to your point of impact.
Choosing a Suitable Target and Range
The choice of target and range for zeroing is crucial for accurate results:
- Target: Opt for a target designed for sighting-in purposes. These targets often feature grid lines and measurement markings that help you make precise adjustments.
- Range: Select a range that suits your firearm and the distance at which you want to zero your red dot sight. For most handguns and short-range rifles, a 25-yard range is sufficient, while longer-range rifles may require 100 yards or more.
By meticulously following these pre-shooting preparations, you lay the foundation for a successful zeroing process. Now that you’ve got your red dot sight mounted, your eye relief and cheek weld dialed in, and you’ve bore sighted your firearm, you’re ready to move on to the critical process of zeroing in your red dot sight for pinpoint accuracy.
The Basics of Zeroing
Zeroing in your red dot sight is a fundamental process that lies at the core of achieving precision and accuracy in shooting. In this section, we’ll delve into the basics of zeroing, understanding the key adjustments, and how to find your initial point of impact (POI).
What is Zeroing and Why is it Crucial?
Zeroing, also known as “sighting in,” is the process of adjusting your red dot sight so that the point of aim (the red dot) aligns with the point of impact (where your shots hit the target). It’s crucial for several reasons:
- Accuracy: A properly zeroed red dot sight ensures that your shots land where you intend, whether you’re in a self-defense scenario, competition, or hunting. This accuracy is vital for success.
- Consistency: Zeroing creates a consistent point of impact, which is essential for maintaining tight groupings and predictable shot placement.
- Distance Compensation: Depending on your firearm and the round you’re using, zeroing allows you to compensate for bullet drop at different distances, ensuring accurate shots at varying ranges.
- Confidence: Knowing that your point of aim matches your point of impact boosts your confidence as a shooter.
Windage and Elevation Adjustments
Two key adjustments are essential in the zeroing process: windage and elevation.
- Windage: This adjustment controls the horizontal movement of your shots. If your shots consistently land to the left or right of the target, you’ll use the windage adjustment to move the point of impact horizontally.
- Elevation: Elevation adjustments control the vertical placement of your shots. If your shots consistently hit above or below the target, the elevation adjustment corrects this.
It’s important to note that adjusting windage and elevation can vary between different red dot sights. Refer to your sight’s manual for precise instructions on making these adjustments.
The Concept of Minute of Angle (MOA) and Milliradian (Mil)
Understanding Minute of Angle (MOA) and Milliradian (Mil) is crucial for making precise adjustments:
- MOA: MOA is an angular measurement used in shooting. One MOA corresponds to approximately 1.047 inches at 100 yards. Most red dot sights allow for 1/4 MOA adjustments, meaning each click moves the point of impact 1/4 inch at 100 yards.
- Mil: A Milliradian is another angular measurement used in shooting. One Mil corresponds to 3.6 inches at 100 yards. Mil adjustments are often in 1/10 Mil clicks, so each click adjusts the point of impact by 0.36 inches at 100 yards.
Understanding MOA and Mil allows you to make precise adjustments based on the size of your target and the distance you’re shooting.
Finding Your Initial Point of Impact (POI)
Before you begin zeroing, it’s essential to find your initial point of impact:
- Set Up the Target: Place a suitable target at your chosen distance, and ensure it’s securely mounted.
- Fire a Group: Fire a series of shots, typically three to five, at the target while maintaining a consistent point of aim.
- Identify the Group’s Center: Determine the center of the group’s impact. This center represents your initial point of impact (POI).
- Adjustments: Use your red dot sight’s windage and elevation adjustments to move the reticle to the center of the group, aligning the point of aim with the point of impact.
By understanding these fundamental aspects of zeroing, you’ll be well-prepared to move on to the practical process of zeroing your red dot sight with precision and accuracy. In the next sections, we’ll explore this process in detail, ensuring that your shots consistently find their mark.
Read Also: Unlocking Precision: A Guide on How to Use a Red Dot Optic
The Process of Zeroing
Now that you understand the basics of zeroing and the importance of achieving pinpoint accuracy with your red dot sight, let’s dive into the practical process of zeroing. We’ll explore the steps involved, adjustments to make, and the vital concept of consistency in shooting.
Initial Shots and Groupings
- Begin at a Short Distance: Start your zeroing process at a relatively short distance, such as 25 yards for most handguns and short-range rifles. This ensures that you can easily observe your shots on the target.
- Fire a Group: Fire a small group of shots, usually three to five rounds. This will help you determine the center of your initial point of impact (POI) on the target.
- Observing the Grouping: Examine the grouping of your shots. If they are consistently off-center from the point of aim, you’ll need to make adjustments to bring them closer to your intended point of impact.
Making Windage Adjustments
- Understand Your Sight’s Adjustments: Familiarize yourself with your red dot sight’s windage adjustment. Most sights use either MOA or Mil clicks, as discussed earlier.
- Adjust for Horizontal Drift: If your initial shots are consistently to the left or right of the target, make horizontal (windage) adjustments. Each click corresponds to a specific measurement at a certain distance (usually 100 yards). Refer to your sight’s manual for exact values.
- Incremental Changes: Make small, incremental changes to your windage setting. Fire another group of shots to confirm if the point of impact has moved closer to your point of aim.
- Repeat as Needed: Continue making adjustments and firing groups until the shots are consistently landing where you want them.
Making Elevation Adjustments
- Understand Your Sight’s Elevation Adjustments: Similar to windage, know how to make elevation adjustments on your red dot sight.
- Adjust for Vertical Drift: If your initial shots consistently hit above or below the target, make vertical (elevation) adjustments. Again, each click corresponds to a specific measurement at a certain distance.
- Small Changes: As with windage adjustments, make small, gradual changes to the elevation setting. Fire groups to confirm your progress.
- Confirmation: Repeatedly adjust and fire until the point of impact aligns with your point of aim.
The Importance of Consistency in Shooting
Consistency is key to successful zeroing:
- Stable Shooting Platform: Maintain a stable shooting platform or position throughout the process. Any changes in your stance or rest can affect the results.
- Consistent Ammo: Use the same type and brand of ammunition throughout the zeroing process to minimize variables.
- Steady Trigger Pull: Maintain a consistent trigger pull technique to minimize shooter-induced errors.
- Eye and Cheek Weld: Ensure your eye relief and cheek weld are consistent for each shot.
Repeating the Process as Needed
- Increase the Distance: Once you’ve achieved a satisfactory zero at a short distance, move to a longer range if necessary. Repeat the process at the desired distance, adjusting for the specific ballistics of your firearm and ammunition.
- Record Your Adjustments: Maintain a record of the adjustments you make, noting the number of clicks for windage and elevation. This will be invaluable for future reference or if you change ammunition.
- Regular Re-Zeroing: Keep in mind that environmental conditions, ammunition changes, and general wear and tear can affect your zero. Regularly re-zero your red dot sight to ensure continued accuracy.
By following this systematic process of zeroing, you’ll be able to achieve consistent and precise shots with your red dot sight. The effort and attention to detail you put into this process will pay off when it matters most, whether it’s in competition, self-defense, or while hunting.
Confirming and Fine-Tuning
Once you’ve gone through the process of zeroing your red dot sight, it’s essential to confirm your zero and fine-tune it for maximum accuracy. This section will guide you through the steps to ensure that your zero is on point and that you’re prepared to make any necessary adjustments.
Shooting Multiple Groups to Confirm Zero
- Fire Additional Groups: After making initial adjustments to your red dot sight, fire a few more groups of shots. This will help confirm that your zero is consistent and not just a result of chance.
- Assess Group Placement: Examine the placement of the groups on the target. If they are consistently centered on your point of aim, your zero is likely correct. However, if there are variations, you’ll need to make further adjustments.
- Record and Compare: Keep a record of the groups, noting their locations and any changes you make to the sight settings. This information will be essential for fine-tuning your zero.
Identifying Common Errors and How to Correct Them
- Common Errors: When assessing your groups, be on the lookout for common errors, including:
- Flinching or anticipating the shot, leading to inconsistent trigger pulls.
- Jerking or slapping the trigger instead of a smooth, controlled press.
- Inconsistent cheek weld or eye relief.
- Correcting Errors: To address these errors:
- Focus on a smooth, consistent trigger pull. Dry-fire practice can help improve your trigger control.
- Pay attention to your cheek weld and eye relief. Ensure they remain consistent with each shot.
- Continued Practice: Consistent, deliberate practice is essential to reduce common errors and improve your overall shooting skills.
Understanding the Impact of Environmental Factors
- Environmental Variables: Environmental factors such as wind, temperature, and humidity can affect your shot placement, even if your red dot sight is correctly zeroed.
- Wind: Wind can cause horizontal drift in your shots. To compensate, you may need to make adjustments to your windage settings based on wind speed and direction.
- Temperature and Humidity: Changes in temperature and humidity can affect bullet velocity and trajectory. Be aware of these factors, especially during long-range shooting.
- Adjustments on the Fly: When shooting in varying conditions, you may need to make adjustments to account for these environmental factors. Keep notes on how changes in conditions impact your shots and your sight adjustments.
- Consistent Data Recording: Maintain a log of your sight adjustments and their effects under different environmental conditions. This will help you anticipate and correct for future variations.
By shooting multiple groups to confirm your zero, identifying common errors, and understanding the impact of environmental factors, you’ll be better prepared to fine-tune your red dot sight and make on-the-fly adjustments when necessary. Shooting consistently and accounting for these variables will lead to more accurate and reliable shooting in real-world scenarios.
Recording Data
Importance of Keeping a Zeroing Log
Maintaining a zeroing log is a critical practice for any shooter looking to maintain peak accuracy with their red dot sight. Here’s why it’s so important:
- Data Reference: Over time, you’ll make various adjustments to your red dot sight based on different shooting conditions and ammunition. A zeroing log allows you to keep track of these adjustments and refer back to them when needed.
- Consistency: When you can refer to previous zeroing data, you’re better equipped to ensure consistent and precise shooting.
- Troubleshooting: If your shots start going astray, your log can help you identify the cause, whether it’s an issue with your red dot sight, changes in ammunition, or environmental factors.
How to Organize and Document Your Adjustments
- Create a Log: Use a dedicated notebook or digital log to record your zeroing adjustments. You can also find specialized apps designed for this purpose.
- Log Format: For each entry, include the date, location, environmental conditions (temperature, wind, humidity), distance, ammunition used, and the number of clicks or adjustments made for both windage and elevation.
- Grouping Data: Record the grouping data for your shots, including the distance from the point of aim for each shot.
- Notes: Include any additional notes about the shooting session, such as observations, challenges, and any changes in your shooting technique.
- Regular Updates: Make it a habit to update your log after each shooting session. This will help you build a comprehensive record over time.
Testing in Real-World Conditions
The Role of Live-Fire Practice
Live-fire practice is an integral part of zeroing your red dot sight and maintaining your shooting skills. Here’s why it’s so crucial:
- Skill Development: Live-fire practice hones your shooting skills and allows you to apply the adjustments you’ve made during zeroing.
- Verification: It’s essential to confirm that your red dot sight is zeroed correctly under real-world conditions. Live-fire practice allows you to validate your zero and ensure it’s accurate for practical shooting scenarios.
- Adaptation: Live-fire practice enables you to adapt to different shooting conditions, such as moving targets, multiple targets, and variable lighting.
Making Adjustments for Different Distances
- Distance-Specific Zeroing: Depending on your shooting discipline and the type of firearm, you may need to zero your red dot sight at different distances. For example, a handgun may be zeroed at 25 yards, while a rifle might require a 100-yard zero.
- Environmental Factors: Consider how environmental factors, such as wind and temperature, affect your shot placement at various distances. Make adjustments accordingly.
- Maintain Your Log: Your zeroing log will be invaluable in helping you adapt your zero for different distances and conditions. Refer to your log when making these adjustments.
Adaptation for Specific Shooting Scenarios
- Consider the Scenario: Different shooting scenarios may require specific zeroing adjustments. For example, self-defense or tactical shooting may involve close-quarters engagements, while hunting often requires shots at varying distances.
- Practice for the Scenario: Regularly practice in scenarios that mimic your intended use of the red dot sight. This will help you adapt your zero and develop the skills required for those situations.
- Know Your Limits: Understand the limitations of your red dot sight and firearm. While it’s versatile, there may be scenarios where iron sights or magnified optics are more appropriate.
Maintenance and Periodic Re-Zeroing
When to Check and Re-Zero Your Red Dot Sight
- Regular Maintenance: Periodically inspect your red dot sight for any signs of damage, loss of zero, or mechanical issues. This is especially important if the sight has been subjected to rough handling or adverse conditions.
- Change in Ammunition: If you switch to a different type or brand of ammunition, re-zero your red dot sight to account for changes in bullet ballistics.
- Environmental Changes: If you frequently shoot in varying environmental conditions, such as different seasons or locations, it’s wise to check and possibly re-zero your red dot sight to accommodate these variations.
- Significant Impact: If your red dot sight is bumped, dropped, or subjected to a significant shock, it’s essential to verify and potentially re-zero it to ensure accuracy.
Caring for Your Red Dot Sight
- Cleaning: Regularly clean your red dot sight’s lenses to remove dirt, debris, and fingerprints. Use a microfiber cloth to avoid scratches.
- Battery Check: Ensure your sight’s battery is fresh and functioning correctly, especially before any critical shooting event.
- Protective Cover: When not in use, consider using a protective cover or cap to safeguard the lens and prevent damage.
- Storage: Store your red dot sight in a secure, dry place to protect it from moisture and extreme temperatures.
By maintaining your red dot sight and periodically re-zeroing it, you’ll ensure that it remains a reliable tool for accurate shooting. Regular live-fire practice, coupled with data recording and adjustment adaptation, will help you adapt to different scenarios and shooting conditions. This level of preparation will undoubtedly enhance your shooting skills and overall performance.
Conclusion
Zeroing in your red dot sight is a fundamental process that can significantly enhance your shooting accuracy and performance. Throughout this comprehensive guide, we’ve covered every aspect of the zeroing process, from understanding red dot sights and their types to making precise windage and elevation adjustments. We’ve delved into the importance of consistency in shooting, the impact of environmental factors, and how to adapt to different shooting scenarios.
We’ve emphasized the value of maintaining a zeroing log to track your adjustments and how live-fire practice is essential for skill development and validation. We’ve also discussed the importance of maintaining your red dot sight through regular maintenance and the periodic need for re-zeroing.
By following the steps outlined in this guide and putting in the effort to hone your skills, you can achieve pinpoint accuracy with your red dot sight. Remember that consistency, practice, and meticulous record-keeping are your allies on the path to becoming a more accurate and confident shooter.
Whether you’re a competitive shooter, a hunter, or someone focused on self-defense, the skills and knowledge gained through this guide will serve you well in various shooting scenarios. We encourage you to continue honing your abilities, adapting to different conditions, and maintaining your equipment for a lifetime of accurate shooting. Your journey to precision begins with zeroing your red dot sight, and it’s a journey well worth taking.