Mastering the Art of Red Dot Sights: A Comprehensive Guide
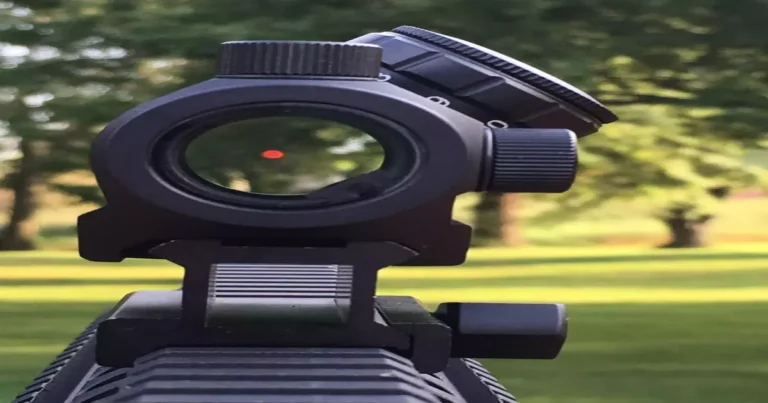
Red dot sights are optical devices used primarily on firearms to assist shooters in aiming and acquiring targets. Unlike traditional iron sights, red dot sights offer a non-magnifying, illuminated reticle that aids in target acquisition and aiming. They utilize a reflective glass or lens that projects an illuminated red dot onto the target, allowing the shooter to aim more efficiently.
Definition and Functionality
Red dot sights function based on the concept of reflex sights, employing an LED (Light Emitting Diode) or a laser diode to produce the aiming point. This aiming point, often a red dot, appears as if it’s projected onto the target itself.
Components of a Red Dot Sight:
- Objective Lens: Allows light to enter the sight.
- Reflective Coating/Mirror: Reflects the reticle’s image.
- LED/Laser Diode: Produces the illuminated red dot.
- Battery Housing: Powers the reticle illumination.
- Adjustment Turrets: Enable zeroing adjustments for windage and elevation.
Advantages over Other Sight Systems
Rapid Target Acquisition
One of the primary advantages of red dot sights is their ability to facilitate rapid target acquisition. By eliminating the need to align front and rear sights, shooters can focus on placing the dot on the target, significantly reducing aiming time.
Improved Accuracy and Sight Picture
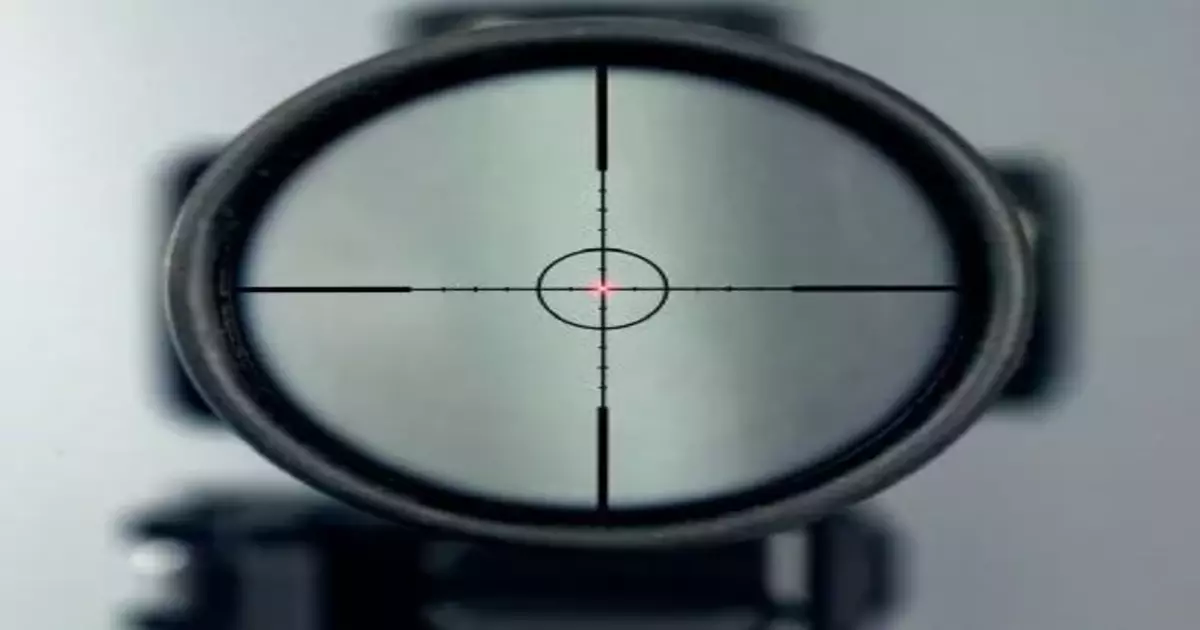
Red dot sights provide a clear and unobstructed field of view, allowing shooters to maintain focus on the target while superimposing the dot for precise aiming. This aids in maintaining accuracy, especially in dynamic or high-pressure situations.
Versatility Across Environments
These sights excel in various lighting conditions. Unlike traditional scopes that may struggle in low-light settings, red dot sights often offer adjustable brightness settings, ensuring visibility in low-light or bright environments.
User-Friendly Design
Red dot sights are generally easy to use and suitable for shooters of varying experience levels. Their intuitive design minimizes the learning curve, making them popular among beginners and seasoned shooters alike.
Adaptability to Multiple Firearms
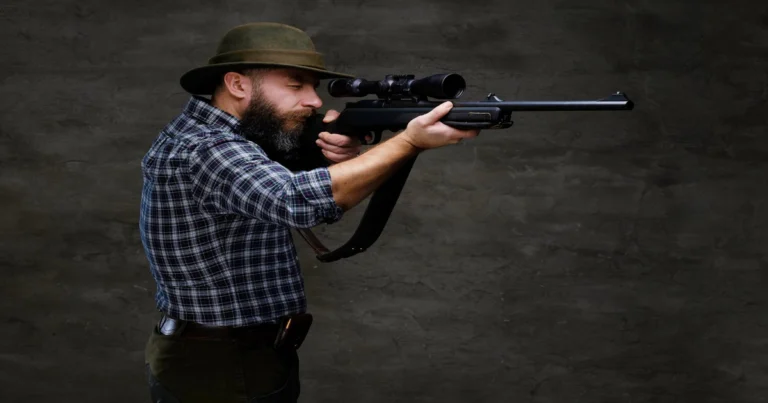
These sights are versatile and can be mounted on various firearms, including rifles, shotguns, and handguns, providing consistent aiming regardless of the platform.
Understanding Red Dot Sights
Types – Tube vs. Open Reflex
Red dot sights come in various configurations, but two primary types stand out: tube and open reflex sights. Understanding their characteristics and applications can help shooters choose the right one for their needs.
Tube Red Dot Sights
Tube red dot sights are designed with a cylindrical housing that encapsulates the optics and internal components. This tube-like structure resembles a miniature scope, offering sturdiness and durability.
Advantages of Tube Red Dot Sights:
- Durability: Enclosed within a protective tube, these sights are robust and can withstand harsh conditions better than open reflex sights.
- Enhanced Protection: The tube design shields the internal components from debris, moisture, and other external elements, reducing the risk of damage.
- Longer Battery Life: Due to their enclosed nature, tube red dot sights often boast longer battery life as they are less affected by environmental factors.
Open Reflex Red Dot Sights
Open reflex sights have a markedly different design, featuring an open structure with a single lens and a reflective surface to project the reticle. These sights are characterized by their exposed window or screen.
Advantages of Open Reflex Red Dot Sights:
- Lightweight and Compact: Open reflex sights are generally more lightweight and compact compared to tube sights, making them ideal for firearms where weight matters, such as handguns or lightweight rifles.
- Wider Field of View: The open design allows for a broader field of view, enabling shooters to maintain situational awareness while aiming down the sight.
- Quick Target Acquisition: With no housing obstructing the view, open reflex sights facilitate rapid target acquisition, crucial in dynamic shooting scenarios.
Choosing the Right Sight
The choice between tube and open reflex red dot sights often depends on personal preferences, shooting scenarios, and the firearm’s intended use. Tube sights excel in ruggedness and extended battery life, while open reflex sights prioritize lightweight design and rapid target acquisition.
Considerations for Selection:
- Use Case: Consider the intended use of the firearm, whether it’s for hunting, competitive shooting, or self-defense.
- Environment: Assess the typical environmental conditions where the firearm will be used—whether it’s dusty, wet, or requires quick target acquisition.
- Preference: Personal preference plays a significant role. Some shooters prefer the enclosed, durable feel of tube sights, while others appreciate the lightweight and open design of reflex sights.
Understanding the distinctions between tube and open reflex red dot sights empowers shooters to make informed decisions based on their specific needs, preferences, and shooting requirements.
Components and Anatomy
Red dot sights, despite their apparent simplicity, encompass several key components that work together to provide shooters with a reliable aiming solution.
Lens and Reticle
Lens:
The lens of a red dot sight is crucial, responsible for transmitting light and presenting the reticle to the shooter. It’s usually treated with anti-reflective coatings to enhance light transmission and minimize glare.
Reticle:
The reticle, often a red dot or other illuminated shape, is projected onto the lens. This point of aim is what shooters align with their target. Some sights offer various reticle options, catering to different preferences or shooting scenarios.
Housing and Body
Tube Sights:
Tube red dot sights consist of a cylindrical housing that encloses the optic components. This design provides protection against impact, moisture, and debris, ensuring the internals remain intact and functional.
Open Reflex Sights:
Open reflex sights have a more exposed body, featuring a window or screen that displays the reticle. The design is typically lighter and more compact than tube sights, offering a wider field of view.
Optic Mechanism
LED/Laser Diode:
The red dot is generated by an LED or laser diode within the sight. When activated, this component emits light, which is reflected onto the lens to create the reticle visible to the shooter.
Adjustment Controls
Brightness Settings:
Most red dot sights come with adjustable brightness settings to accommodate various lighting conditions. This feature allows shooters to increase or decrease the intensity of the reticle, ensuring visibility in different environments.
Windage and Elevation Adjustments:
These controls enable shooters to fine-tune the sight alignment. Windage adjustments move the reticle left or right, while elevation adjustments move it up or down, aiding in zeroing the sight for accurate shooting.
Battery Compartment
Red dot sights are powered by batteries, usually placed within the sight’s body or housing. Battery compartments are designed for easy access to facilitate quick battery changes when necessary.
How Red Dot Sights Work
Red dot sights are optical devices designed to simplify aiming and improve accuracy for firearms. Their functionality is based on a simple yet ingenious mechanism known as reflex sight technology.
Optical Mechanism
Reflex Sight Principle:
Red dot sights operate on the principle of a reflex sight, utilizing an illuminated reticle projected onto a lens. This reticle, commonly a red dot or another illuminated shape, acts as the aiming point for shooters.
Working Principle
Light Emission:
At the heart of a red dot sight lies an LED (Light Emitting Diode) or a laser diode. This light source emits a beam, typically red in color, that forms the illuminated reticle visible through the sight.
Reflection and Projection:
The emitted light is directed onto a partially reflecting mirror or a coated lens located within the sight. This mirror or lens reflects the light back toward the shooter’s eye.
Reticle Presentation:
As the reflected light reaches the shooter’s eye, it superimposes the reticle onto the sight picture. This means that when the shooter looks through the sight, they see the red dot or reticle floating over the target.
Advantages of the System
Rapid Target Acquisition:
Red dot sights offer a significant advantage in facilitating quick target acquisition. Unlike traditional iron sights that require aligning front and rear sights, red dot sights only necessitate placing the dot on the target.
Both Eyes Open Shooting:
One of the notable benefits of red dot sights is the ability to shoot with both eyes open. This technique enhances situational awareness, enabling shooters to maintain a broader view of their surroundings while focusing on the target.
Adaptability to Changing Conditions:
Red dot sights often feature adjustable brightness settings. This adaptability allows shooters to modify the intensity of the dot, ensuring optimal visibility in varying lighting conditions, from bright daylight to low-light environments.
Red dot sights operate by projecting an illuminated reticle onto a lens, simplifying the aiming process for shooters. Their ease of use, rapid target acquisition, and adaptability across different lighting conditions make them a favored choice for shooters across diverse disciplines, from recreational shooters to law enforcement and military personnel.
Understanding the fundamental workings of red dot sights empowers shooters to make informed decisions regarding their firearm optics, enhancing their overall shooting experience and accuracy.
Getting Started: Red Dot Sight Setup
Setting up a red dot sight involves several crucial steps to ensure optimal performance and accuracy.
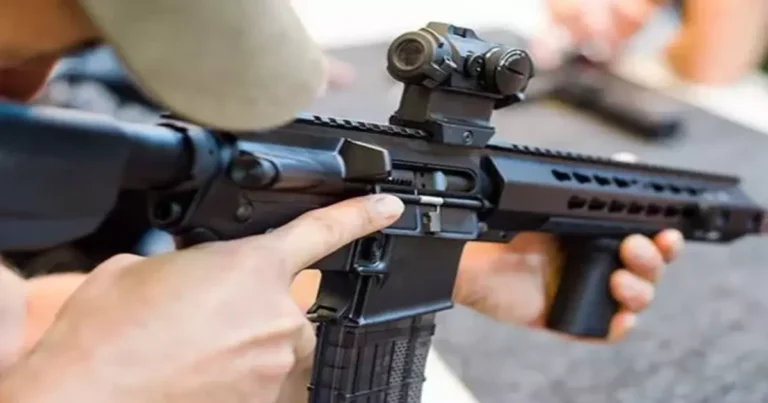
Mounting a Red Dot Sight
1. Choosing the Mount:
Select a compatible mount for your firearm and red dot sight. Consider factors like the type of firearm (rifle, shotgun, handgun), the sight’s design, and the mounting options available for your specific firearm model.
2. Positioning and Alignment:
Place the mount on the firearm’s rail system, ensuring it’s securely attached. Align the mount so that it provides a comfortable and ergonomic position for sighting. Tighten the mounting screws appropriately to prevent any movement.
3. Attaching the Red Dot Sight:
Carefully attach the red dot sight onto the mount, ensuring it sits securely without any wobbling or misalignment. Follow the manufacturer’s instructions for securing the sight onto the mount.
Adjusting the Brightness and Reticle
1. Powering On the Sight:
Turn on the red dot sight using the designated power switch or button. Confirm that the sight’s battery is functional and has sufficient charge for operation.
2. Adjusting Brightness Settings:
Experiment with the brightness settings to find the optimal level for the red dot’s visibility in your current lighting conditions. Many sights offer multiple brightness levels, allowing customization based on ambient light.
3. Fine-Tuning the Reticle:
If your sight allows for reticle customization, adjust the reticle shape or style according to your preference or shooting scenario. Some sights offer various reticle options, such as dot sizes or different reticle patterns.
Proper Positioning on the Firearm
1. Eye Relief and Comfort:
Position the red dot sight at a comfortable distance from your eye, ensuring adequate eye relief. This distance should allow you to acquire the reticle quickly and maintain a clear sight picture without straining your eye.
2. Co-Witnessing (if applicable):
For firearms with iron sights or backup sights, ensure the red dot sight is co-witnessed correctly. Co-witnessing allows aligning the red dot with the iron sights, providing redundancy in case of sight failure.
3. Stability and Secure Fastening:
Verify that the red dot sight is securely fastened to the firearm and does not shift or lose zero during handling or recoil. Regularly check the sight’s mounting screws for any signs of loosening.
How to Sight a Red Dot
Basics of Zeroing
Understanding Zeroing:
Zeroing a red dot sight refers to aligning the reticle with the firearm’s point of impact at a specific distance. This process ensures that when you aim using the red dot, your shots hit the intended target accurately.
Factors to Consider:
- Distance: Choose a standard distance for zeroing your red dot sight, often 25 or 50 yards/meters, depending on your shooting preferences and the firearm’s intended use.
- Stability: Maintain a stable shooting platform, using a rest or sandbags to eliminate as much shooter-induced error as possible.
- Consistency: Use high-quality ammunition to achieve consistent results during zeroing.
Step-by-Step Guide to Zeroing a Red Dot Sight
1. Choose the Distance:
Select a suitable distance for zeroing your red dot sight. Common distances include 25 yards/meters or 50 yards/meters, depending on the firearm and its intended use.
2. Set Up a Stable Shooting Platform:
Ensure you have a stable shooting position, whether using a bench rest, sandbags, or a supported prone position. Consistency in shooting posture aids accuracy during zeroing.
3. Aim at the Target Center:
Using a stable shooting position, aim directly at the center of the target. Ensure your reticle is aligned precisely where you want the bullet to strike.
4. Fire a Group of Shots:
Shoot a series of three to five rounds at the target without adjusting the sight. This shot group helps determine the initial point of impact.
5. Evaluate the Shot Group:
Examine where the shots have landed in relation to the target center. Measure the distance and direction of the group from the bullseye to understand how much adjustment is needed.
6. Make Windage and Elevation Adjustments:
Using the sight’s adjustment dials or knobs, make incremental adjustments for windage (horizontal) and elevation (vertical) to move the point of impact closer to the target center.
7. Re-shoot and Fine-Tune:
Fire another group of shots after making adjustments. Continue adjusting and shooting until the point of aim consistently matches the point of impact at the chosen distance.
8. Confirm Zero at Different Distances:
After zeroing at the initial distance, confirm the zero at various distances to ensure the red dot’s accuracy across the firearm’s effective range.
Preparation and Safety Measures
1. Safety First:
Ensure the firearm is unloaded and pointed in a safe direction. Always treat the firearm as if it is loaded, keeping fingers off the trigger until ready to shoot.
2. Set Up a Controlled Environment:
Choose a shooting range or area that allows for a clear and safe shooting experience. Ensure there are no obstacles or bystanders downrange.
3. Gather Necessary Equipment:
Have the required tools for sight adjustment, such as a screwdriver or adjustment tool specific to your red dot sight model.
Initial Alignment Process
1. Mount the Red Dot Sight Securely:
Ensure the red dot sight is securely mounted on the firearm following manufacturer instructions. Tighten mounting screws appropriately to prevent any movement or misalignment.
2. Establish a Baseline:
Begin by aiming at a target (paper target or bullseye) at a known distance, typically 25 yards/meters. Align the red dot sight with the target center using a stable shooting position.
3. Fire Test Shots:
Fire a series of shots (three to five rounds) at the target without adjusting the sight. This initial shot group will establish the starting point for adjustments.
Fine-Tuning and Zeroing-in
1. Evaluate the Shot Group:
Examine the shot group on the target. Measure the distance and direction of the shots from the target center to understand the necessary adjustments.
2. Windage and Elevation Adjustments:
Utilize the sight’s adjustment knobs for windage (horizontal) and elevation (vertical) to move the point of impact towards the target center. Make small, incremental adjustments.
3. Re-Shoot and Reassess:
Fire another series of shots after making adjustments. Repeat the process, continuing to fine-tune the sight until the point of aim consistently matches the point of impact on the target.
4. Confirm Zero at Different Distances:
After zeroing at the initial distance, confirm the zero at various distances to ensure consistency and accuracy across the firearm’s effective range.
Techniques for Using a Red Dot Sight
Mastering a red dot sight involves understanding specific techniques for target acquisition, maintaining proper sight picture, alignment, and practicing drills to enhance proficiency.
Acquiring the Target
1. Establish a Ready Position:
Start with the firearm in a low ready or a compressed ready position, ensuring safety and control while allowing quick transition to the target.
2. Use Both Eyes Open:
Keep both eyes open while focusing on the target. This technique enhances situational awareness and allows for better peripheral vision.
3. Bring the Red Dot into View:
Quickly bring the firearm up to your line of sight while simultaneously acquiring the red dot within the sight’s window or screen.
4. Center the Dot on Target:
With the red dot in view, move the firearm until the dot is centered on the target. Maintain focus on the target while aligning the dot for accurate aiming.
Proper Sight Picture and Sight Alignment
1. Maintain Consistent Eye Relief:
Position your eye at a consistent distance from the red dot sight to maintain proper eye relief. This ensures a clear and unobstructed view of the red dot.
2. Align the Dot and the Target:
Ensure the red dot remains centered on the target while aligning the dot with the desired point of impact. Focus on the dot rather than the firearm’s alignment.
3. Control Breathing and Trigger Pull:
Control your breathing to minimize movement and execute a smooth trigger pull. Maintain focus on the red dot and the target throughout the shooting process.
Shooting Drills for Practice
1. Dot Tracking Drill:
Practice moving the firearm smoothly while tracking a moving target with the red dot. This drill enhances coordination and tracking skills.
2. Target Transitions:
Engage multiple targets in quick succession, shifting focus from one target to another and aligning the red dot on each target efficiently.
3. Controlled Shot Groups:
Practice shooting controlled and consistent shot groups on a target, focusing on maintaining proper sight alignment and trigger control.
Utilizing a red dot sight effectively involves mastering target acquisition, maintaining a proper sight picture, and consistently aligning the red dot with the intended point of impact. Incorporating specific shooting drills into regular practice sessions enhances proficiency and accuracy with the red dot sight, ultimately improving shooting performance.
Troubleshooting and Adjustments
Red dot sights, while reliable, may encounter issues that affect their performance. Understanding common problems and adjusting for environmental factors can help shooters maintain optimal sight functionality.
Common Red Dot Sight Issues
1. Dot Flickering or Intermittent Illumination:
Solution: Check the battery’s charge and replace if low. Ensure the battery compartment is clean and contacts are free from corrosion. If the issue persists, contact the manufacturer for further assistance.
2. Drifting Zero or Inconsistent Point of Impact:
Solution: Confirm the mount and sight are securely attached. Tighten mounting screws appropriately. Check for any loose connections or damage to the sight. Re-zero the sight if necessary.
3. Blurred or Distorted Reticle:
Solution: Clean the lens and the reflective surface carefully using a microfiber cloth. Avoid using harsh cleaners or abrasives that may damage the lens coatings.
Adjusting for Environmental Factors
1. Wind:
Solution: Understand wind’s impact on bullet trajectory and adjust aiming slightly into the wind to compensate for drift. Use environmental cues (such as moving foliage) to estimate wind speed and direction.
2. Temperature and Humidity Changes:
Solution: Extreme temperature fluctuations can affect zero. Re-check zero when transitioning between temperature extremes. Keep the sight protected during temperature and humidity changes.
3. Low-Light Conditions:
Solution: Adjust the brightness settings of the red dot sight accordingly. Increase brightness in low-light conditions for better visibility of the dot.
Troubleshooting common issues with red dot sights involves simple checks and maintenance routines. Additionally, understanding and compensating for environmental factors like wind, temperature, and light conditions can significantly impact the sight’s performance and accuracy.
Regular maintenance, proper care, and making adjustments for environmental variables ensure that the red dot sight performs optimally in various shooting situations, enhancing the shooter’s overall experience and accuracy.
Advanced Red Dot Sight Techniques
Mastering advanced techniques with a red dot sight involves honing skills for shooting while in motion, seamlessly transitioning between targets, and effectively engaging moving targets.
Shooting on the Move
1. Stable Stance and Controlled Movement:
Maintain a stable shooting platform even while on the move. Focus on a controlled and deliberate movement to minimize sway or erratic motion.
2. Smoothly Track the Red Dot:
Train to smoothly track the red dot on the sight while moving. This requires coordination between body movement and tracking the dot’s placement on the target.
3. Practice Dynamic Drills:
Engage in drills that simulate real-world scenarios, moving between cover or shooting while advancing, to improve accuracy while on the move.
Transitioning Between Targets
1. Focus on Sight Alignment:
Transition smoothly between targets while maintaining proper sight alignment. Move the red dot from one target to another efficiently without losing focus or stability.
2. Establish a Systematic Process:
Develop a systematic process for target transitions. This might involve scanning the area for targets, prioritizing them, and smoothly shifting focus from one to the next.
3. Train with Multi-Target Drills:
Practice drills involving engaging multiple targets at different distances or angles. Work on transitioning between targets swiftly and accurately.
Engaging Moving Targets
1. Lead and Anticipate Movement:
When engaging moving targets, learn to lead the target slightly to compensate for its movement. Anticipate the target’s path to place the red dot where the target will be.
2. Maintain Tracking and Trigger Control:
Focus on maintaining consistent tracking of the moving target with the red dot while ensuring proper trigger control for accurate shots.
3. Incorporate Moving Target Drills:
Participate in drills specifically designed for engaging moving targets. Start with slow-moving targets and gradually increase the difficulty to challenge your skills.
Mastering advanced techniques with a red dot sight involves dedicated practice and refinement of skills. Shooting on the move, transitioning between targets smoothly, and effectively engaging moving targets require a combination of coordination, focus, and skillful manipulation of the red dot sight.
Maintenance and Care
Proper maintenance and care are crucial for ensuring the longevity and optimal performance of a red dot sight. Regular cleaning, battery maintenance, and replacement contribute to its reliability.
Cleaning the Red Dot Sight
1. Gather Cleaning Supplies:
Collect cleaning supplies such as a microfiber cloth, lens cleaner specifically designed for optics, and Q-tips or soft brushes for intricate areas.
2. Remove Excess Debris:
Start by gently removing any excess dirt, dust, or debris from the sight’s exterior using a soft brush or cloth. Be careful not to scratch the lens.
3. Clean the Lens:
Apply a small amount of lens cleaner to a clean microfiber cloth. Gently wipe the lens in a circular motion, starting from the center and moving towards the edges. Use a dry portion of the cloth to remove any excess cleaner.
4. Clean Other Components:
Carefully clean other components, such as the sight body and adjustment knobs, using a soft cloth or Q-tips dampened with the lens cleaner. Ensure these parts are dry before reassembly.
Battery Maintenance and Replacement
1. Regularly Check Battery Life:
Periodically check the battery level of the red dot sight to ensure it remains functional. Consider a routine check during cleaning sessions or before critical shooting engagements.
2. Prevent Corrosion:
Inspect the battery compartment for any signs of corrosion. Clean the contacts using a cotton swab or cloth if corrosion is present. Consider using anti-corrosion products or silicone grease on the battery contacts to prevent future corrosion.
3. Replace Batteries Proactively:
As a preventive measure, replace the batteries at regular intervals, even if they appear functional. Batteries might lose efficiency over time, affecting the sight’s performance.
Regular maintenance and care are essential for the longevity and performance of a red dot sight. Cleaning the lens and components meticulously ensures clarity and optimal functionality. Additionally, proactive battery maintenance and replacement contribute to the sight’s reliability during critical moments.
Incorporating these maintenance practices into a regular schedule ensures that the red dot sight remains in top condition, offering consistent and reliable performance for various shooting applications.
Tips for Bore Sighting a Red Dot Sight
Bore sighting a red dot sight is a critical step in aligning the sight with the firearm’s bore, ensuring initial accuracy before zeroing-in. Follow these steps to effectively bore sight your red dot sight:
Importance of Bore Sighting
1. Establishing Initial Alignment:
Bore sighting helps establish an initial alignment between the red dot sight and the firearm’s bore, reducing the adjustments needed for zeroing.
2. Saving Time and Ammunition:
By aligning the sight close to the bore initially, shooters save time and ammunition during the zeroing process, making it more efficient.
Step-by-Step Guide to Bore Sighting
1. Secure the Firearm:
Ensure the firearm is unloaded and secured in a stable position using a gun vise or other secure holding device.
2. Remove the Bolt or Open the Action:
For rifles, remove the bolt or open the action to provide a clear view through the barrel.
3. Center the Firearm:
Ensure the firearm is centered and secured in the vise or holding device to prevent any movement during the sighting process.
4. Look Through the Barrel:
Peek through the barrel from the breech end, aligning it with a fixed point or distant object. Use a bore sighting tool if available for precision.
5. Align the Red Dot Sight:
Without moving the firearm, adjust the red dot sight’s windage and elevation until the red dot aligns with the point seen through the barrel.
6. Recheck Alignment:
After making adjustments, verify the alignment by looking through the barrel again. Fine-tune the sight if necessary until the red dot aligns with the bore view.
Bore sighting a red dot sight provides an initial alignment that minimizes adjustments needed for zeroing. This process saves time and ammunition while establishing a close alignment between the sight and the firearm’s bore, contributing to improved accuracy during zeroing.
Red Dot Sight Applications in Different Scenarios
Red dot sights offer versatile applications across various shooting disciplines, providing advantages in hunting, competitive shooting, and tactical/self-defense scenarios.
Hunting with a Red Dot Sight
1. Quick Target Acquisition:
Red dot sights enable hunters to swiftly acquire their targets, particularly in dense foliage or low-light conditions, allowing for faster and more precise shots.
2. Improved Field of View:
The open sight picture provided by red dot sights enhances the hunter’s field of view, making it easier to track moving game and aim more accurately.
3. Versatility Across Firearms:
Red dot sights can be mounted on rifles, shotguns, and even handguns, offering versatility for hunters using various firearms for different game types.
Competitive Shooting
1. Faster Target Transitions:
In competitive shooting, the speed of target acquisition and transitions between multiple targets is crucial. Red dot sights facilitate quicker transitions for improved performance.
2. Enhanced Precision:
Red dot sights assist shooters in achieving precise shots, particularly in dynamic shooting disciplines where accuracy and speed are paramount.
3. Consistency in Aiming:
The consistent aiming point offered by red dot sights aids competitors in maintaining a consistent sight picture, resulting in improved accuracy over various courses of fire.
Tactical and Self-Defense Applications
1. Rapid Target Acquisition:
Red dot sights offer rapid target acquisition in high-stress situations, allowing for quicker response times and improved accuracy during critical moments.
2. Both Eyes Open Shooting:
The ability to shoot with both eyes open enhances situational awareness, crucial in tactical scenarios, enabling users to remain vigilant of their surroundings.
3. Low-Light Performance:
Red dot sights equipped with adjustable brightness settings excel in low-light conditions, ensuring the reticle remains visible for accurate aiming in self-defense situations.
The applications of red dot sights span across hunting, competitive shooting, and tactical/self-defense scenarios. Their ability to provide quick target acquisition, enhanced precision, and adaptability across various firearms make them invaluable tools for shooters in diverse shooting disciplines.
Conclusion
In the world of firearms optics, red dot sights stand out as versatile tools offering rapid target acquisition, improved accuracy, and adaptability across various shooting scenarios. From hunting in challenging environments to competitive shooting arenas and tactical/self-defense applications, the benefits of red dot sights are evident.
These optical devices provide shooters with a clear advantage, allowing for both eyes open shooting, quick target transitions, and consistent aiming points. Red dot sights enhance shooters’ capabilities by providing a reliable aiming solution that excels in diverse lighting conditions and aids in acquiring targets swiftly and accurately.
Understanding the mechanics, proper setup, maintenance, and various applications of red dot sights empowers shooters to optimize their performance in their chosen shooting disciplines. Whether in the field, on the range, or in high-stress situations, the reliability and efficiency of red dot sights make them an indispensable asset for shooters seeking improved accuracy and efficiency.
Red dot sights continue to revolutionize the shooting experience, offering a balance of speed, precision, and adaptability that significantly contributes to shooters’ success across different shooting endeavors.